
Comparison
TinyOwl vs ImageOptim
ImageOptim and TinyOwl both process images locally on a Mac, but they are built around different habits: a focused free optimizer versus reusable workflows with optional delivery to your own storage.
Short answer
Keep ImageOptim if you want a free, open-source Mac utility for a focused local image-optimization job, including metadata cleanup. Its current documentation is the right source for supported macOS versions and preferences.
Try TinyOwl if you use an Apple Silicon Mac and want to save a multi-step image routine—resize, compress, then optionally upload finished output to storage you already control—and run it from several Mac entry points.
For many people, the honest answer is to keep both: use ImageOptim for its focused optimization workflow and TinyOwl for format/export or delivery routines that you repeat often.
Key differences
| Question | ImageOptim | TinyOwl |
|---|---|---|
| Primary model | Free, open-source local image optimizer. | One-time-license local workflow app. |
| Default job | Optimize image files and remove unnecessary metadata according to its preferences. | Save a repeatable resize → compress → optional upload path. |
| Device support | See ImageOptim’s current macOS requirements. | Apple Silicon Macs running macOS 12 or later. |
| Starting a routine | A focused app workflow for the files you select. | Main window, menu bar, clipboard while active, or Finder Open With. |
| Upload to your storage | Not the reason to choose the product. | Optional workflow step to your own R2, S3, OSS, COS, MinIO, or compatible endpoint. |
| Cost | Free; donations supported by its project. | See TinyOwl’s current pricing page for trial and one-time-license terms. |
This page does not publish a speed or file-size race. We have not run a controlled ImageOptim-versus-TinyOwl corpus with matching settings, so a head-to-head number would not be useful or honest.
Workflow fit
TinyOwl makes the handoff after compression explicit:
Resize (optional) → Compression → Upload (optional)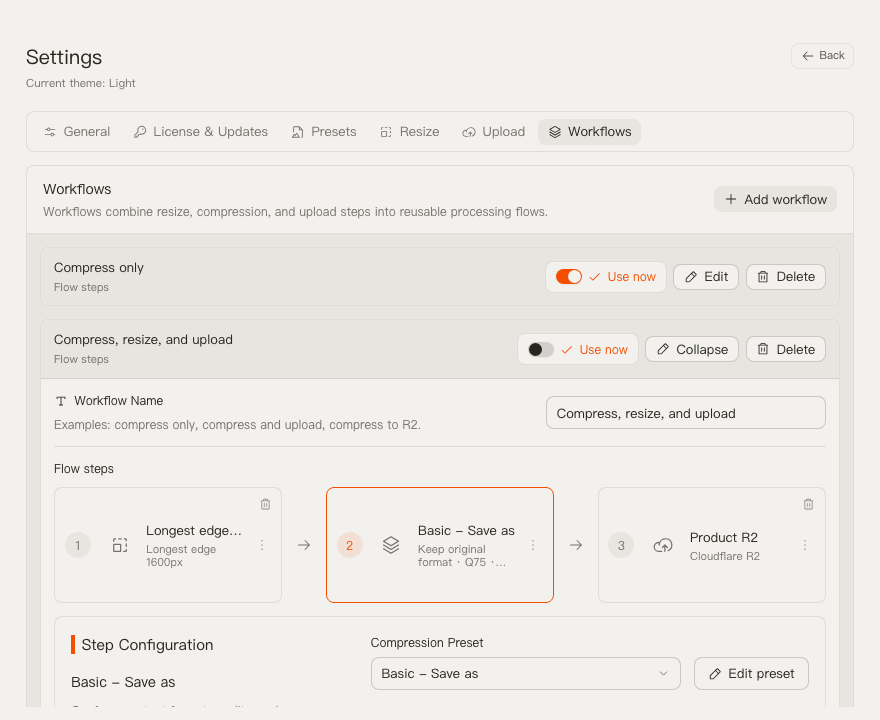
That can help when the result has a known destination: a blog image needs a constrained size and WebP output, or a documentation batch needs to land in your own bucket. If no upload is needed, leave that step out and keep the output local.
TinyOwl’s Benchmark is useful for understanding its own presets. It is deliberately not presented as an ImageOptim comparison.
When ImageOptim is the better fit
ImageOptim may remain the clearer choice when:
- free and open-source software is a requirement;
- you want a focused local optimizer rather than saved multi-step workflows;
- metadata cleanup and its existing preferences already match your process;
- you need a Mac that TinyOwl does not support.
Do not switch merely because an alternative page exists. If ImageOptim already delivers the exact files you need, keeping that established habit is reasonable.
Try both safely
- Use copies of a small set of images you know well.
- Run ImageOptim as you normally would.
- In TinyOwl, make one save-as workflow that keeps the original format, then a separate WebP or AVIF workflow only if you need that delivery format.
- Compare the results at the final display size before changing a Finder or publishing habit.
See the guide for TinyOwl settings and the compare hub for the other decision guide.