
Guide
Quick Start
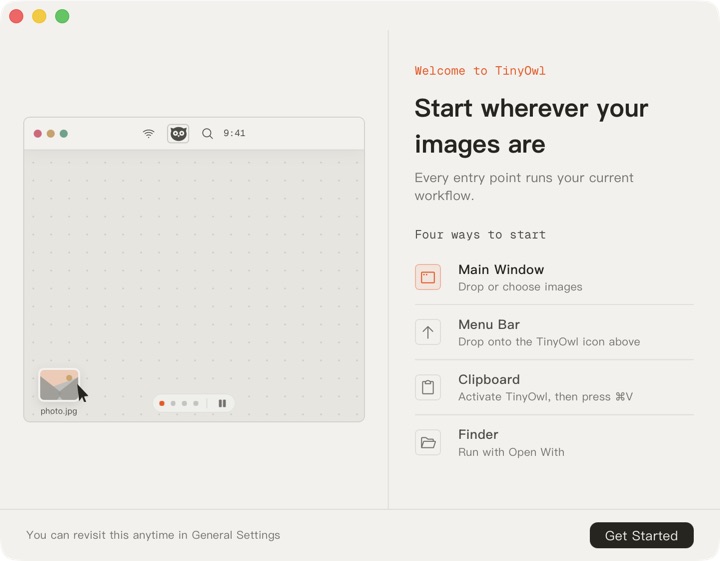
Start with a quick tour of four image entry points. After configuring a workflow, run it from the main window, menu bar, clipboard, or Finder.
First Launch
On first launch, TinyOwl shows a short single-page tour of the main window, menu bar, clipboard, and Finder entry points. Pause the animation when needed, or click any method to replay it. To revisit the tour later, open Settings -> General -> Getting Started.
Run Your First Local Batch
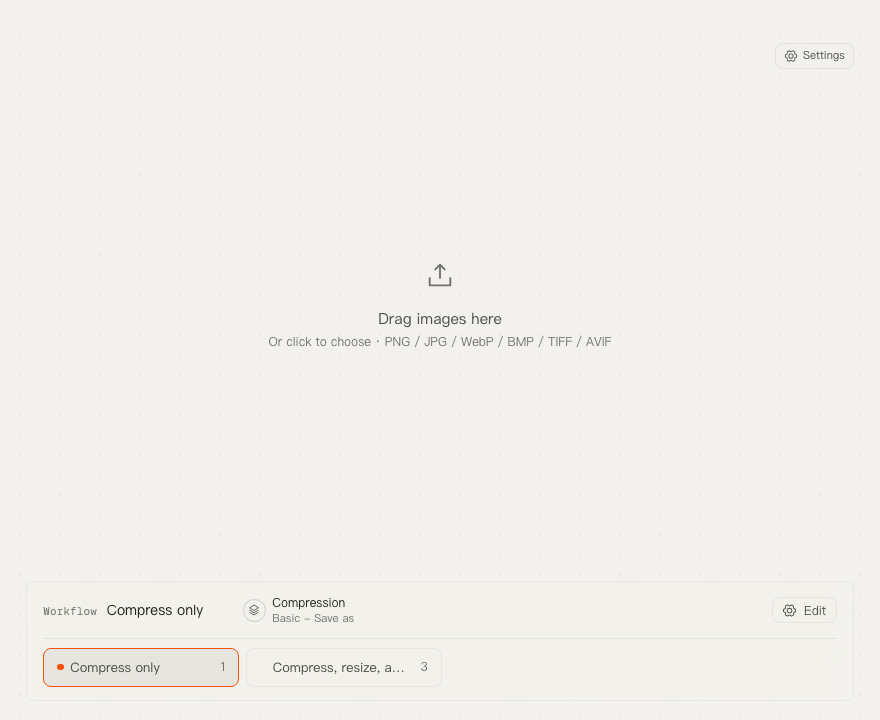
Use the built-in Compress only workflow when you only want local compression.
- Open the main TinyOwl window.
- Before adding images, select Compress only from the workflow area at the bottom.
- Drop images into the window, choose Select Images, or choose Paste Images.
- The first time you use a save-as preset, choose an output folder when prompted.
- TinyOwl immediately runs the active workflow.
- Review each file in the list: saved path, compressed size, status, and any error message.
Understand the Workflow Summary
The main window shows the selected workflow as a compact sequence of steps:
Resize -> Compression -> UploadOnly Compression is required. Resize appears when the workflow changes image dimensions before compression. Upload appears when the workflow sends compressed files to a configured provider.
The main window is useful for configuring workflows and reviewing larger batches. For routine work, use the menu bar or Finder entry points below. Use Configure in the workflow panel, or open Settings -> Workflows, when you need to edit the workflow itself.
Daily Entry Points
After selecting and configuring a workflow, you do not need to keep the main window open.
The steps below are the shortest path for three everyday entry points. See Menu Bar, Clipboard, and Finder for panel actions, result controls, and behavior after closing the main window.
Drag Images to the Menu Bar
- Drag one or more supported images toward the TinyOwl icon in the menu bar.
- When the pointer reaches the icon or the area directly below it, the drop panel appears.
- Release the images in the panel. TinyOwl runs the current workflow and keeps progress and results in the same panel.
- After processing, use the available result actions to open the list, reveal local output, or copy an uploaded link.
Start from the Clipboard
- Copy one or more images in another app.
- Activate the TinyOwl main window or menu bar panel.
- Press
Command + V. TinyOwl sends the clipboard images through the active workflow.
Command + V only responds while TinyOwl is active. It is not registered as a system-wide shortcut.
Open Selected Images from Finder
- Select one or more supported images in Finder.
- Right-click and choose Open With → TinyOwl.
- TinyOwl opens the main window and adds the selected images directly to the processing list.
- Review the current workflow, then run it. This skips the file picker while preserving a final check before processing.
When to Open Settings
Open Settings when you want to change reusable building blocks:
- Use Compression Presets to control format, compression level, save behavior, and compressed filename behavior.
- Use Resize Presets to create reusable dimension rules.
- Use Upload Providers to add Cloudflare R2, S3, OSS, COS, MinIO, or another S3-compatible destination.
- Use Workflows to combine resize, compression, and upload into one reusable flow.
- Use General Settings and License to change appearance or language and review trial, license, and update status.
See Troubleshooting when a task pauses, an upload fails, or a batch is limited.
A Safe First Workflow
For new setups, start conservatively:
- Keep compression in save-as mode.
- Run a small batch first.
- Confirm the output folder and filenames.
- If upload is involved, test the provider connection before running a large batch.
- Only use overwrite presets after checking the output on copies.