
Workflow
Prepare Images for Forum Posts on a Mac
Forum posts often need several images, but the constraints are set by the community—not by the image tool. This workflow helps you prepare a local batch at the right size, compress it, and optionally copy a hosted link for destinations that allow it.
AI assisted the initial structure. TinyOwl’s screens, workflow order, crop confirmation, and copy actions were reviewed on an Apple Silicon Mac with TinyOwl v0.7.6.
Version note: checked with TinyOwl v0.7.6 on macOS 12 or later on Apple Silicon.
Check the Posting Rules Before You Prepare a Batch
There is no universal “forum image” setting. A community may accept files uploaded in its own composer, permit external image URLs, block hotlinked images, limit file size, or reject a format that works everywhere else. Check the posting page, its help text, or the moderator rules before you prepare a large batch.
Three answers are worth having first:
- Does the forum want files uploaded directly, or does it render externally hosted images?
- Is there a maximum file size, pixel dimension, or required aspect ratio?
- Does it accept WebP and external URLs, or should you keep JPEG/PNG and use its built-in uploader?
TinyOwl does not post to a forum or change any community’s acceptance rules. It prepares local image files and, when you have configured a public destination, can help you copy a link to the uploaded result.
If a forum only accepts its own file uploader, a local resize-and-compress workflow is still useful: save the finished files to a folder, then upload those files in the forum composer yourself.
Choose Size and Crop With Intent
Use a proportional resize for ordinary screenshots and photos. A Longest edge or Width preset keeps the original aspect ratio, which is usually safer for a sequence of images explaining a problem or a build.
Choose Crop to frame only when the destination specifically needs a fixed shape—for example, a square gallery thumbnail or a landscape banner. TinyOwl center-crops to the requested frame and does not upscale a smaller source. That means edge content can be lost. The app asks for confirmation before the crop runs; cancel if the frame cuts off an important label, diagram, or part of a screenshot.
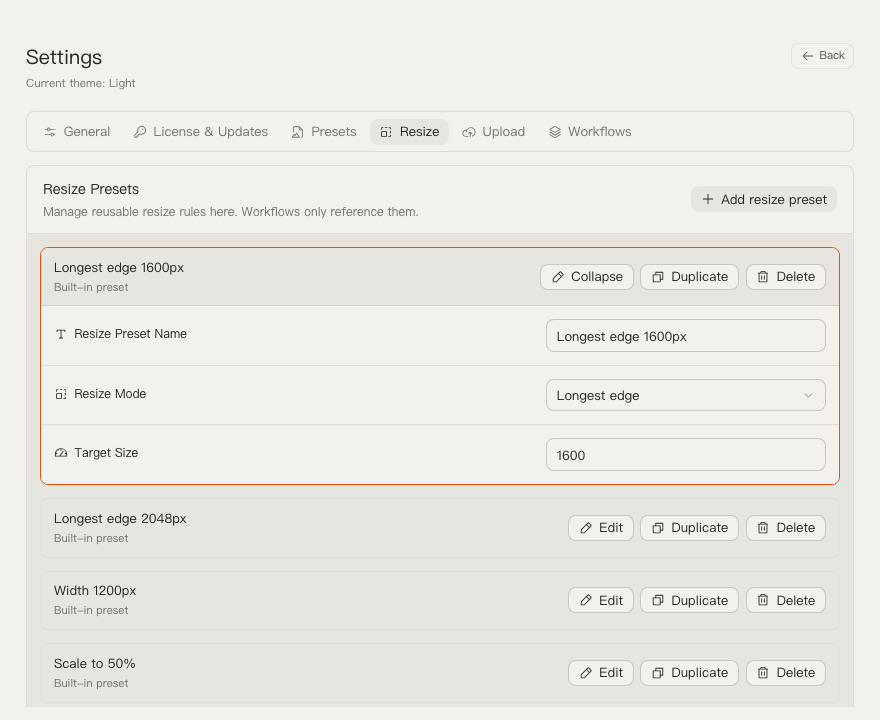
The Resize Presets guide lists the available modes and explains how crop-to-frame differs from proportional resizing. When images need legible UI text, use the largest size the destination allows instead of making a small image look sharper through compression settings alone.
Save a Forum Workflow Instead of Rebuilding It for Every Post
In Settings → Workflows, create a workflow with a task name such as Forum images — 1600px or Forum images — square. TinyOwl always runs steps in this order:
Resize (optional) → Compression → Upload (optional)- Add a resize step only when the forum has a useful size or frame requirement.
- Select a compression preset. Choose an output format the destination accepts; WebP is not a safe assumption for every forum.
- Add an upload step only when you already have a tested storage provider and the forum permits external images.
- Use a dated path and a timestamped or random filename strategy if you may upload files with repeated names.
- Select Use now so the same workflow is available from the main window and menu bar.
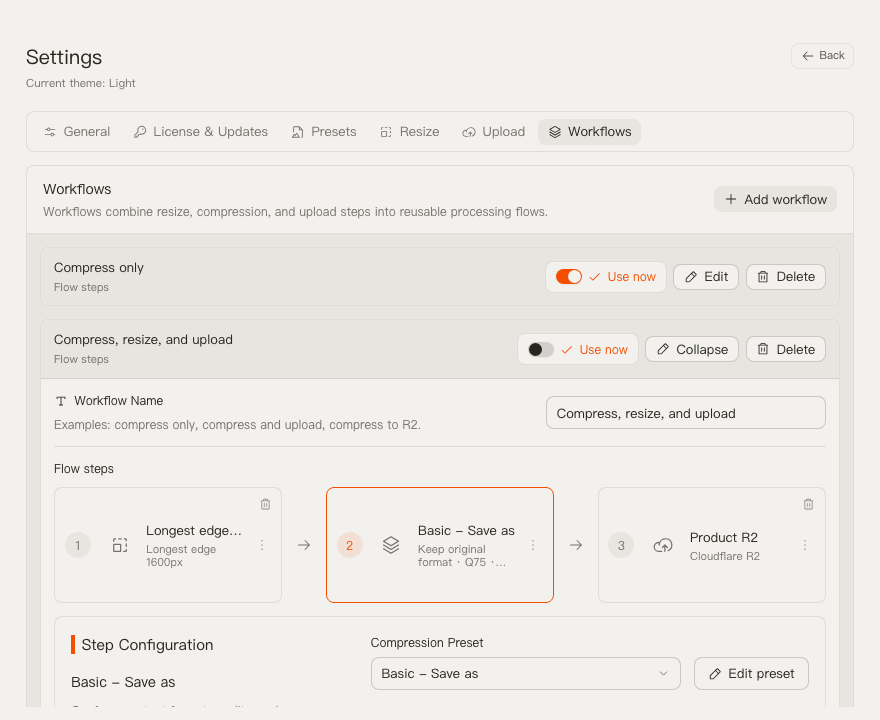
For a provider you have not used before, configure and test it under Upload Providers before adding it here. A generic endpoint needs its own endpoint, bucket, region, request style, and public-delivery checks; the S3-Compatible Image Upload Workflow walks through those fields without assuming a particular host.
Run the Batch, Then Paste Only Where It Is Accepted
Add the images from Finder, or paste a clipboard image into TinyOwl when you are preparing one screenshot. Review a crop confirmation before continuing. After local compression finishes, inspect the result files before publishing—especially screenshots with small text or diagrams.
When the workflow uploads successfully and its provider has a working Public Base URL, TinyOwl can copy a URL or a Markdown image reference from the file list. Use Copy Link when the composer expects an image URL. Use Copy Markdown only where that syntax is supported, then replace any filename-based alt text with a useful description.
For the forum itself, start with one non-sensitive image. Open the copied URL in a private browser window, paste it into a draft, and use the forum preview if it has one. That quick check separates three different things:
- the object reached your storage;
- the object has a publicly reachable URL; and
- the forum decided to render that URL.
Only the first two are controlled by your storage setup. The last one belongs to the forum.
When a Hosted Image Link Does Not Work
A successful upload does not make an object public, and a public object does not guarantee that a forum will embed it. These are separate checks.
| What you see | What to check next |
|---|---|
| Upload succeeds but there is no copyable link | Confirm that the provider has an already-working Public Base URL. This field builds links; it does not make a bucket public. |
The copied URL returns 403 or 404 | Check public delivery and compare the workflow path and filename with the object key in the storage console. |
| The URL opens in a browser but does not render in the post | Read that forum’s external-image and hotlink policy. Use its own uploader if it requires one. |
| Images are too large or text is unreadable | Revisit the destination’s limits, then adjust the resize preset or output format and test a single file again. |
The Troubleshooting guide covers upload and crop confirmations in more detail. Keep a separate workflow for each recurring target rather than changing one general workflow before every post. The practical benefit is not automatic forum publishing—it is spending less time repeating the same resize, compression, and storage steps before you return to the conversation.